Attach images in KB in Dynamics 365
Scenario
To add images in knowledge article, we need to provide the image URL. In CRM we can add image as a web resource and we can get the URL of the image.
To achieve this, I have created a custom entity to create an image web resource
Entity Name : New_WebResource
| Attribute Name | Attribute Type |
| Name | Single line of text |
| Image URL | Single line of text –Format (URL) |
| Image Type | Option set (PNG -5 , JPEG -6) |
| Image Description | Multiple lines of text |
| base64_value | Multiple lines of text |
Step 1
Create a web resource with the type as html and add the below code. The below html will help you to upload the image and can get and set the base64 value of the uploaded image in “base64_value” attribute.
Step 2
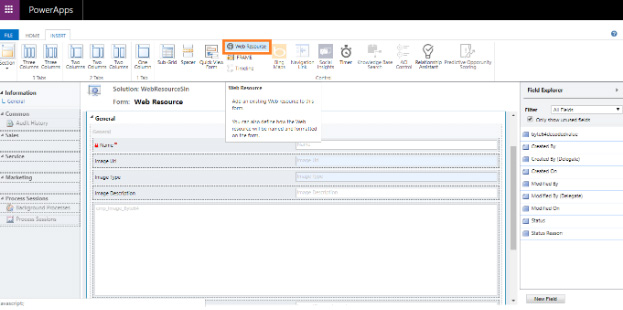
Open entity’s main form and add all the above attributes. Click on web resource in form editor and choose our web resource from step 1.
Step 3
Create a new web resource with the type of java script. Add the below code.
function getstring(context)
{
var type;
var textdescription=Xrm.Page.getAttribute('cmp_base64_value').getValue();
//checks the base64_value is null or not
if(textdescription ==null)
{
//if the uploaded file is not an image then the base64_value is null and shows the alert.
alert("please choose image file.");
var saveEvent = context.getEventArgs();
saveEvent.preventDefault();
}
if(textdescription != null)
{
//splitting the unwanted characters from base64_value, to get the exact base64 value of the image.
var removelast2character= textdescription.slice(0, -2);
var getbeforecomma= textdescription.slice(0, textdescription.lastIndexOf(","));
var format=getbeforecomma.split('/')[1];
var finalformat=format.split(';')[0];
var teste=removelast2character.split(',')[1];
if(Xrm.Page.ui.getFormType() == "1")
{
//Create web resource (custom entity)
if(finalformat=="png" ||finalformat=="PNG")
{
//Image type is PNG
var type=5;
create(type, teste);
}
else if(finalformat =="jpeg" || finalformat =="JPEG" || finalformat =="jpg" || finalformat =="JPG")
{
//Image type is JPG
var type=6;
create(type,teste);
}
else
{
//Image type is not equal to PNG (Or) JPG
alert("Record has not been published. Please select PNG (or) JPEG type image");
Xrm.Page.getAttribute('cmp_base64_value').setValue("");
var saveEvent = context.getEventArgs();
saveEvent.preventDefault();
//preventAutoSave(econtext);
}}}}
function create(type, base64str)
{
if(Xrm.Page.ui.getFormType() == "1")
{
//Creating web resource in Dynamics 365.
//Below is the url format of the web resource location. Change it for your CRM org.
var url="https://mastermind8.crm8.dynamics.com//WebResources/";
var imagedescription=Xrm.Page.getAttribute("cmp_imagedescription").getValue();
var name=Xrm.Page.getAttribute("cmp_name").getValue();
var nowname=name.split(' ').join('');
var bytevalue=Xrm.Page.getAttribute("cmp_base64_value").getValue();
var entity = {};
entity.content = base64str;
entity.webresourcetype = type;
entity.name = "new_"+nowname;
entity.displayname = name;
entity.languagecode = 1033;
entity.description = imagedescription;
var req = new XMLHttpRequest();
req.open("POST", Xrm.Page.context.getClientUrl() + "/api/data/v8.2/webresourceset", true);
req.setRequestHeader("OData-MaxVersion", "4.0");
req.setRequestHeader("OData-Version", "4.0");
req.setRequestHeader("Accept", "application/json");
req.setRequestHeader("Content-Type", "application/json; charset=utf-8");
req.onreadystatechange = function() {
if (this.readyState === 4) {
req.onreadystatechange = null;
if (this.status === 204) {
var uri = this.getResponseHeader("OData-EntityId");
var regExp = /\(([^)]+)\)/;
var matches = regExp.exec(uri);
var newEntityId = matches[1];
var nowurl=url+"new_"+nowname+"?preview=1";
Xrm.Page.getAttribute("cmp_imageurl").setValue(nowurl);
if(type=="5")
{
Xrm.Page.getAttribute("cmp_imagetype").setValue(5);
}
else
{
Xrm.Page.getAttribute("cmp_imagetype").setValue(6);
}
setTimeout(function () {Xrm.Page.data.entity.save(); }, 2000);
} else {
Xrm.Utility.alertDialog(this.statusText);
}
}
};
req.send(JSON.stringify(entity));
}
}
Step 4
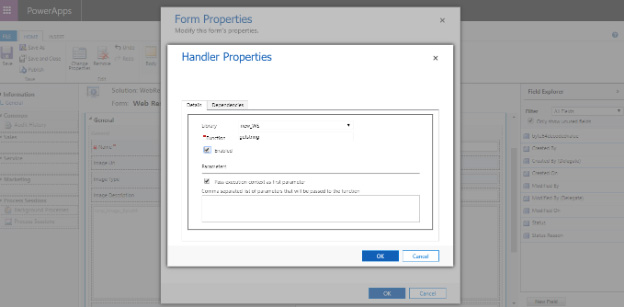
Navigate to form editor click on Form Properties, add our library and in Event handler call the “getstring” function in “On Save” event of form. Select the check box “Pass execution context as first parameter.” Because we have used the context in our function.
Step 5
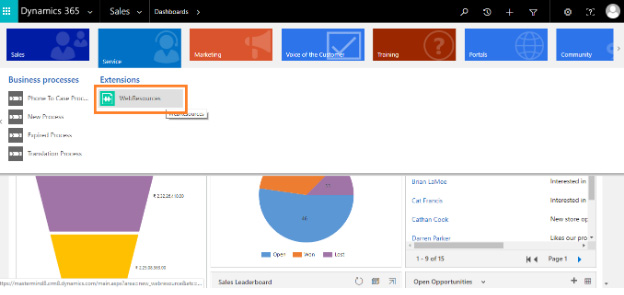
Save the form and then click on “Publish”. Navigate to Service sitemap and click on “Web Resources”.
Note: I have selected “Service” sitemap to display this entity (new_webresource).
Step 6
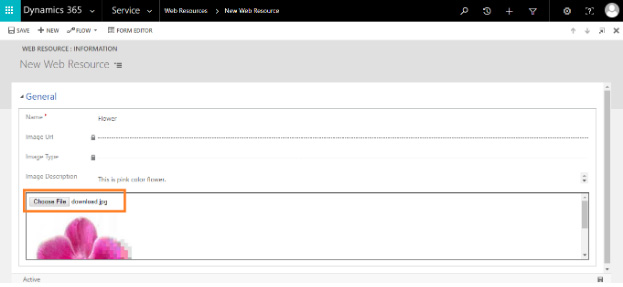
Create new. Upload JPG or PNG image and click on “Save”.
Step 7
After save, the URL of the image will be populated. Copy the image URL.
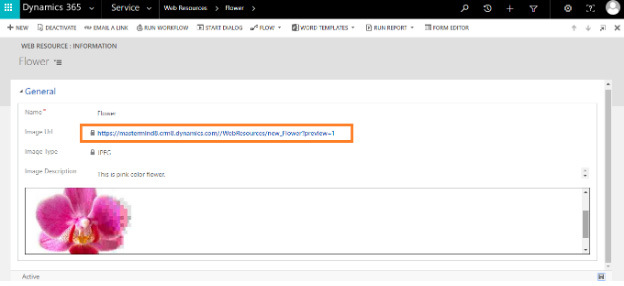
Step 8
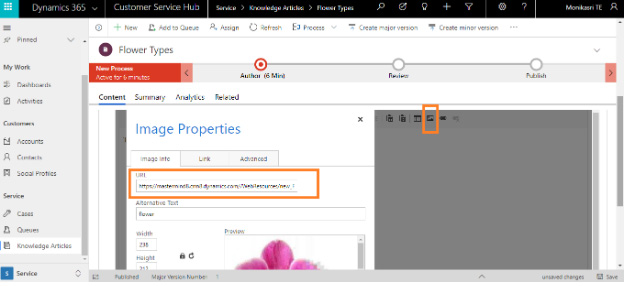
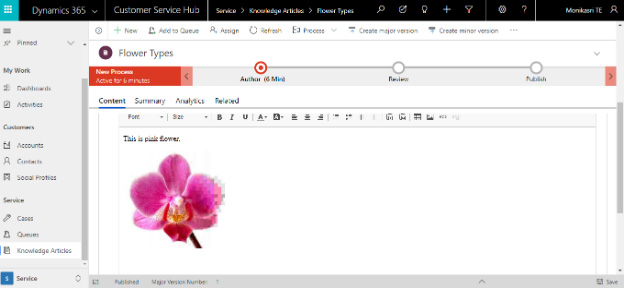
Navigate to “Customer Service Hub” and click on “Knowledge Articles”. Create New. In Content area click on image icon and paste the copied Web resource URL from step 7, then click “OK”. Save this KB and publish it. Now it is visible in Knowledge article. We can refer this KB in case and it will show the KB text content and images.
Step 9
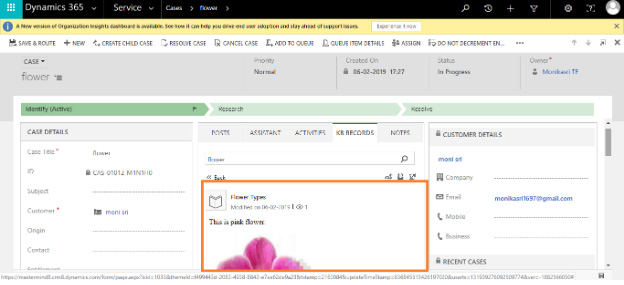
Open a new case and search this KB. It will show the KB content. We can attach this with our case for reference.
Happy CRMing..!
 This article was written by Monika Sri


